UX case study
Scaly Music App
A music learning app that makes practicing scales actually fun. I designed it to be visual and interactive, so both students and teachers can easily master the basics of music.
View the full project on Figma (opens in a new tab)
At a glance
The brief
An app for practicing scales in landscape, designed from scratch with the client’s team.
Key features
Readable notation (or a lighter summary), optional metronome and drone, and Again-to-Easy ratings.
Collaboration
Regular syncs with the team and client kept the flow and practice screen honest as scope shifted.
Approach
Clear hierarchy, reusable Figma components and touch targets sized for short practice sessions.
Process
- Persona
- Flow map ×4
- Landscape sketches
- Practice screen in 4 passes
- Final screens in color
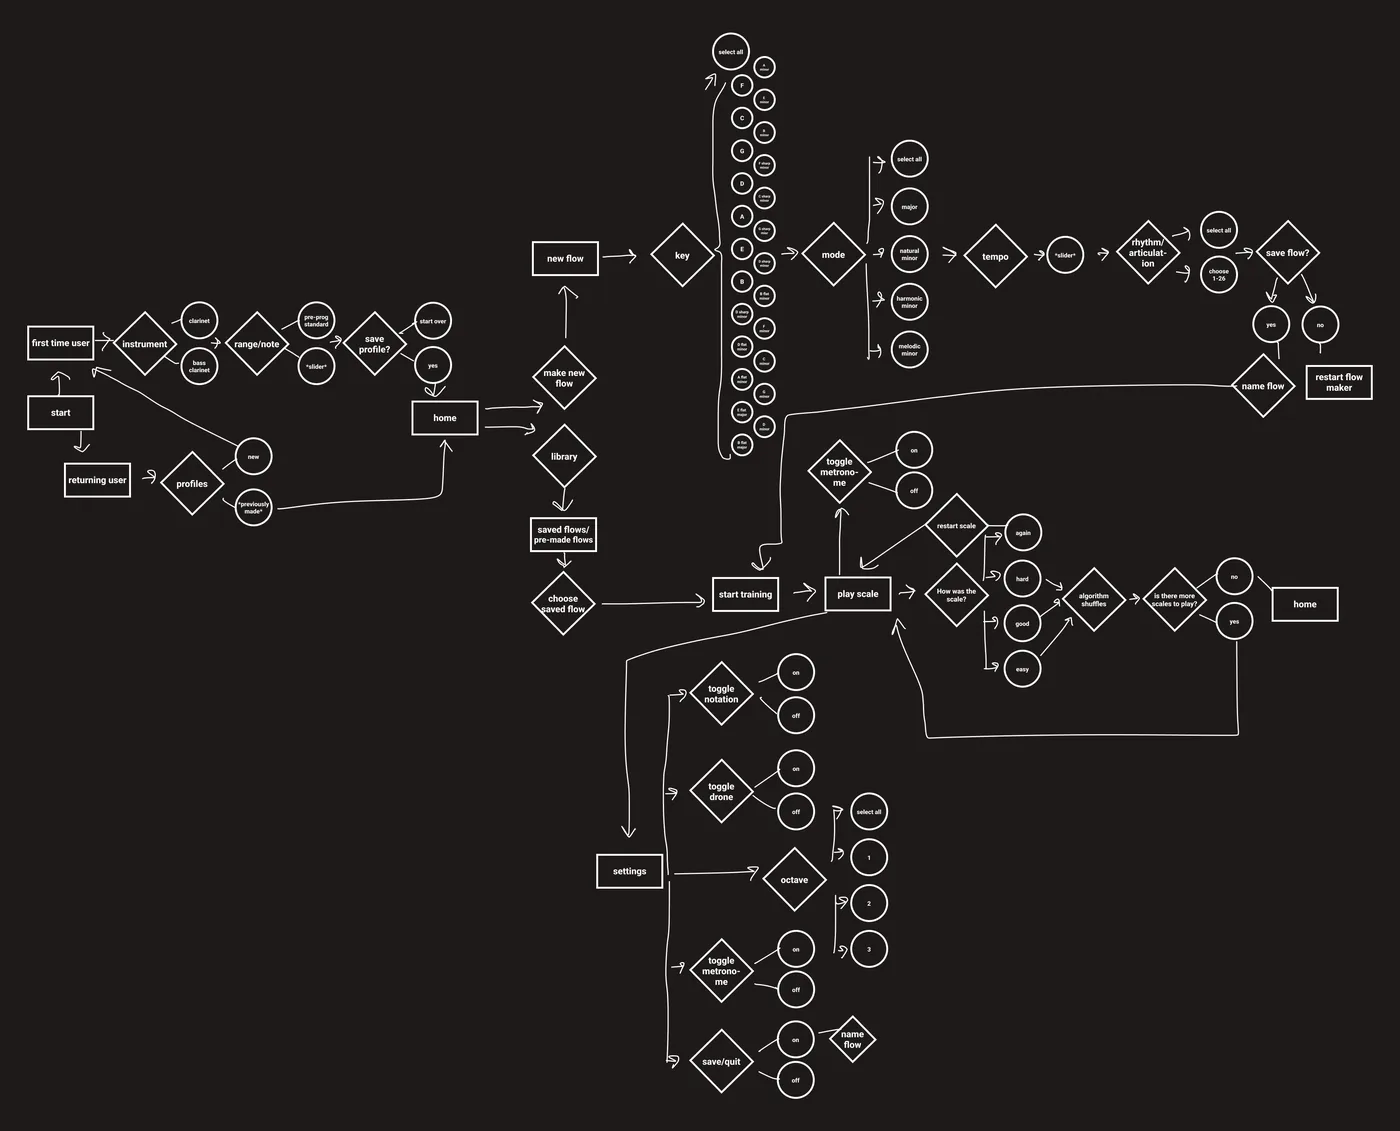
Mapping out flow
This diagram is not the final shipped flow. Because we were building the app from scratch, I used it as a shared map of how the experience should hang together so we could spot gaps early and fold in screens or steps that still needed to exist. We iterated on it four times as the product took shape.
Read the flow as text
Getting started
- First-time user: choose instrument (clarinet or bass clarinet) → set range/note (pre-programmed standard or a slider) → save profile? (yes goes home, or start over).
- Returning user: profiles → pick a previously made profile to go home, or “new” to start the first-time setup.
From home
- Make new flow: key (select all, or any major or minor key) → mode (select all, major, natural minor, harmonic minor, melodic minor) → tempo (slider) → rhythm/articulation (select all, or choose 1–26) → save flow? Yes: name flow and start training. No: restart the flow maker.
- Library: saved or pre-made flows → choose a saved flow → start training.
Training
- Play scale, with metronome on/off and the option to restart the scale.
- Rate how the scale went: again, hard, good or easy.
- The algorithm shuffles the next scale. If there are more scales, play again; if not, return home.
Settings (from play scale)
- Toggle notation, drone and metronome on/off.
- Octave: select all, 1, 2 or 3.
- Save/quit, then name the flow.
Persona
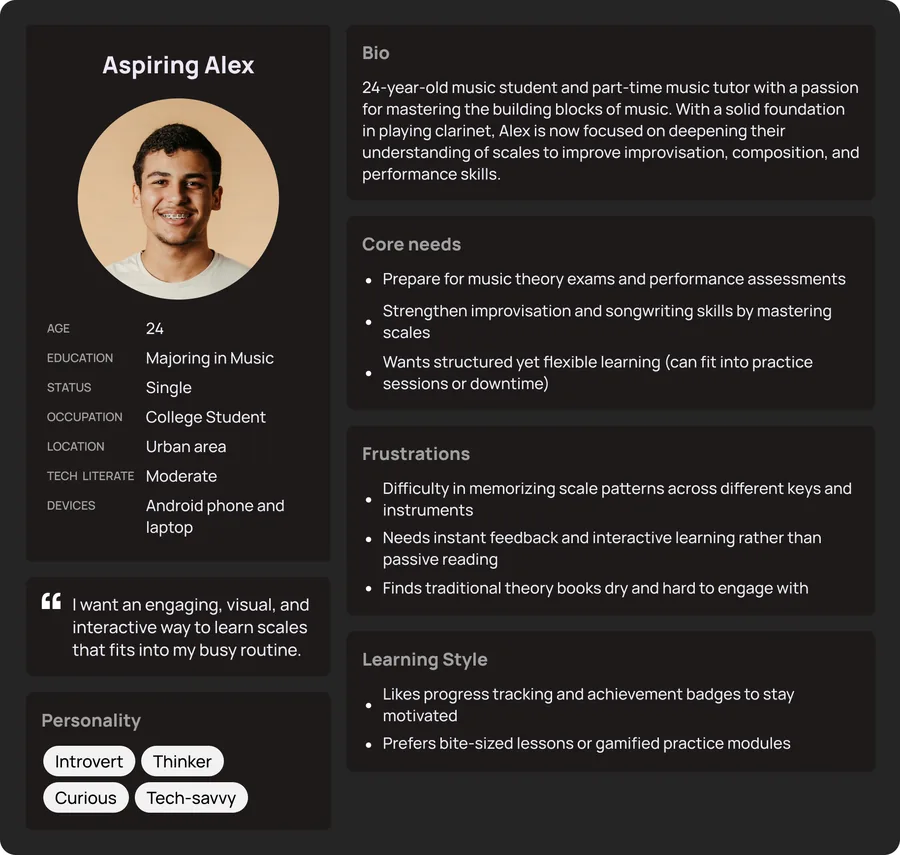
This is not a portrait of a real person. It is a synthesized persona I used to empathize with who we were designing for while the project moved forward. I spoke with our team to understand the client and their learners, paired that with some light research, and turned it into a clear archetype we could keep coming back to.
Read Aspiring Alex’s persona as text
Aspiring Alex
- Age
- 24
- Education
- Majoring in Music
- Status
- Single
- Occupation
- College Student
- Location
- Urban area
- Tech literate
- Moderate
- Devices
- Android phone and laptop
Quote
“I want an engaging, visual, and interactive way to learn scales that fits into my busy routine.”
Personality
Introvert, Thinker, Curious, Tech-savvy
Bio
24-year-old music student and part-time music tutor with a passion for mastering the building blocks of music. With a solid foundation in playing clarinet, Alex is now focused on deepening their understanding of scales to improve improvisation, composition, and performance skills.
Core needs
- Prepare for music theory exams and performance assessments
- Strengthen improvisation and songwriting skills by mastering scales
- Wants structured yet flexible learning (can fit into practice sessions or downtime)
Frustrations
- Difficulty in memorizing scale patterns across different keys and instruments
- Needs instant feedback and interactive learning rather than passive reading
- Finds traditional theory books dry and hard to engage with
Learning style
- Likes progress tracking and achievement badges to stay motivated
- Prefers bite-sized lessons or gamified practice modules
Ideation sketches
First-pass landscape mobile concepts for octave, range, key, instrument, and scale pattern flows—quick paper-style explorations to shape the direction before higher-fidelity screens.
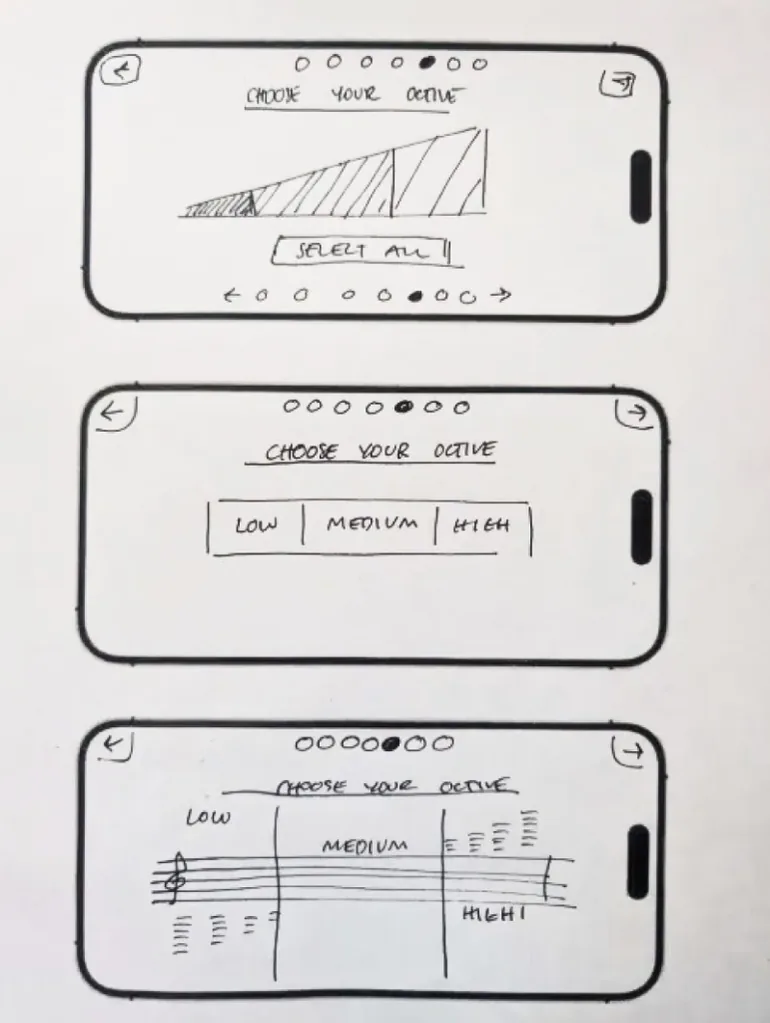
Choose your octave 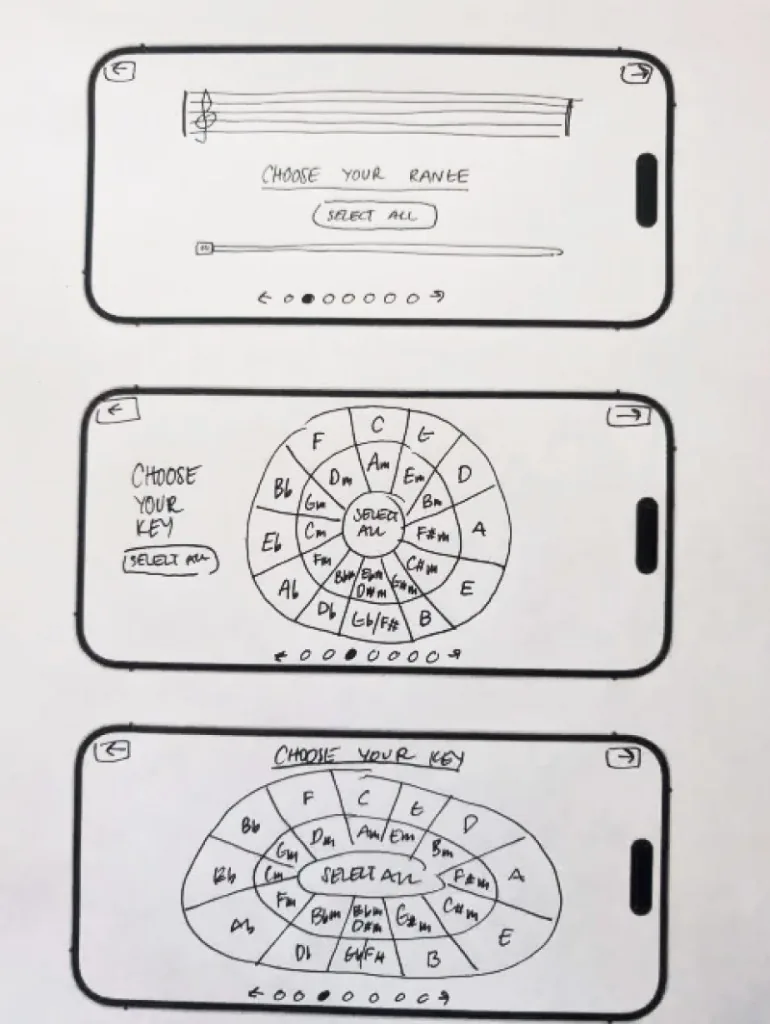
Choose your range and key 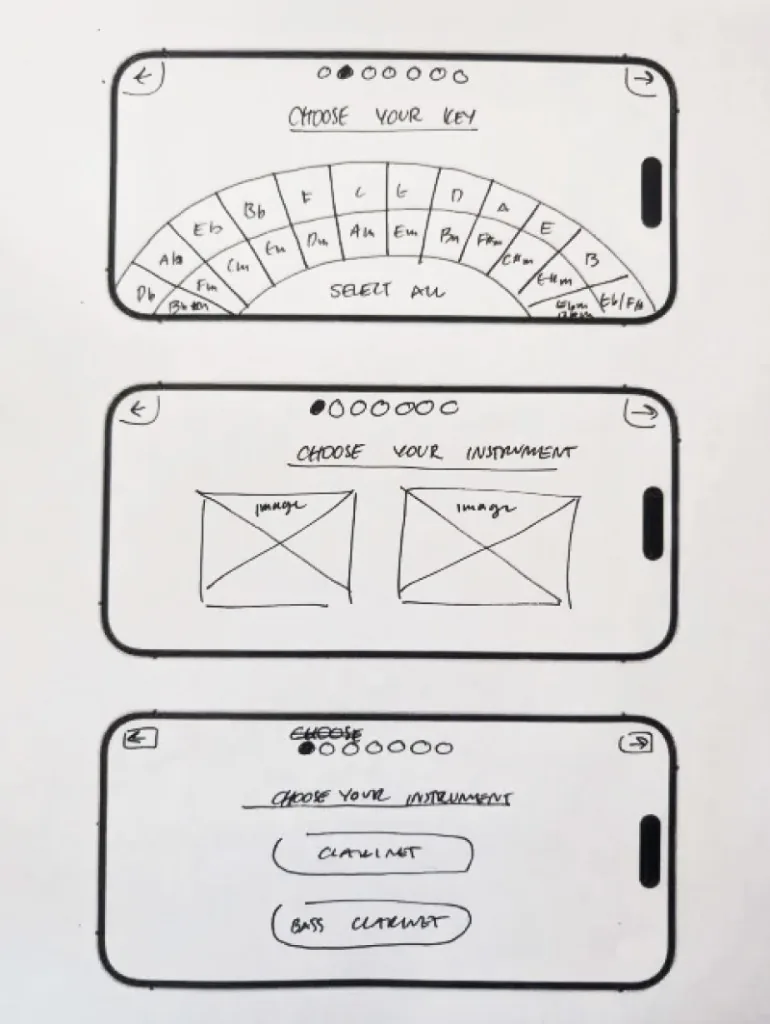
Choose your instrument 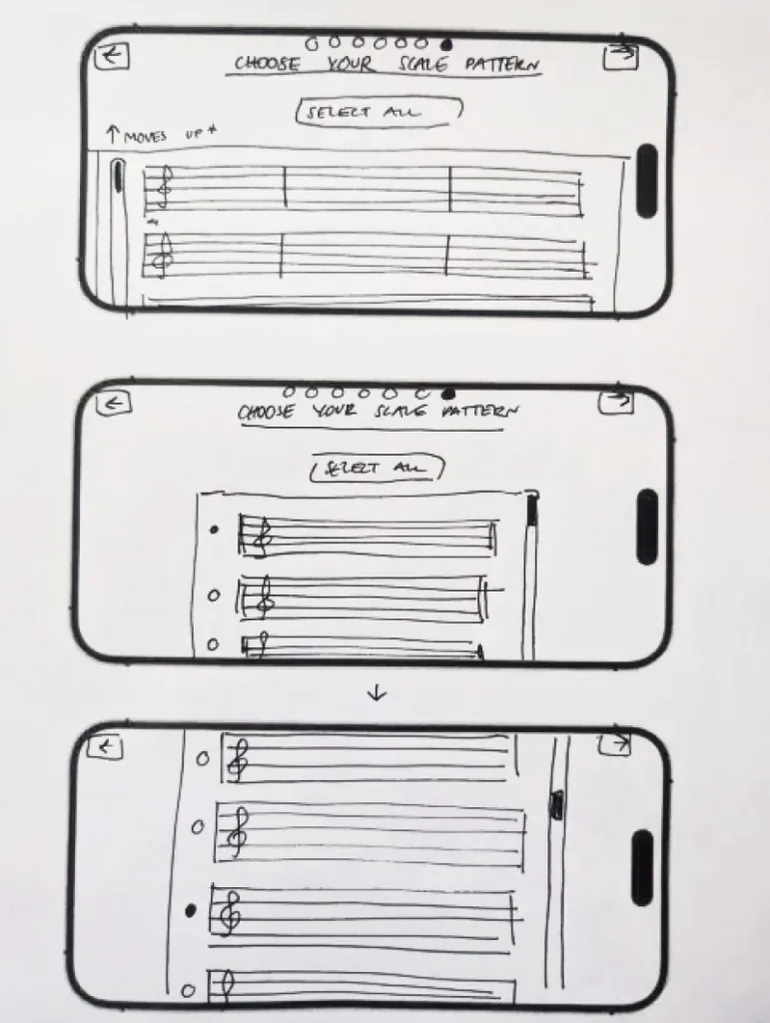
Choose your scale pattern
1 / 4
Designing the practice screen
This is the screen where students see the scale they are working on and mark how challenging it felt. I built it in four passes. Each pass fixed something the last one had not solved yet, so you can follow the reasoning from structure to final edge cases.
Lo-fi layout map
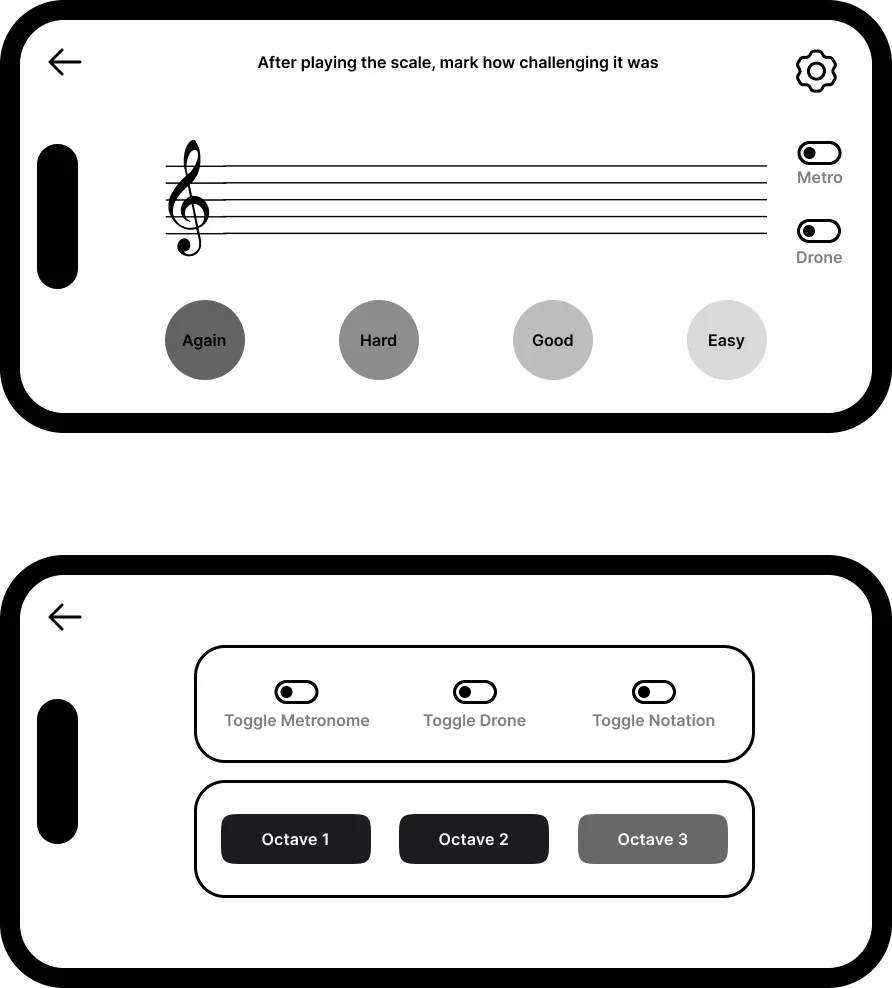
I started with a simple landscape wireframe and bounding boxes. I needed to agree on where the staff, the main actions, and the rating row would sit before any visual design. This step did not decide how settings would behave. It only locked the skeleton so later iterations were not fighting a moving layout.
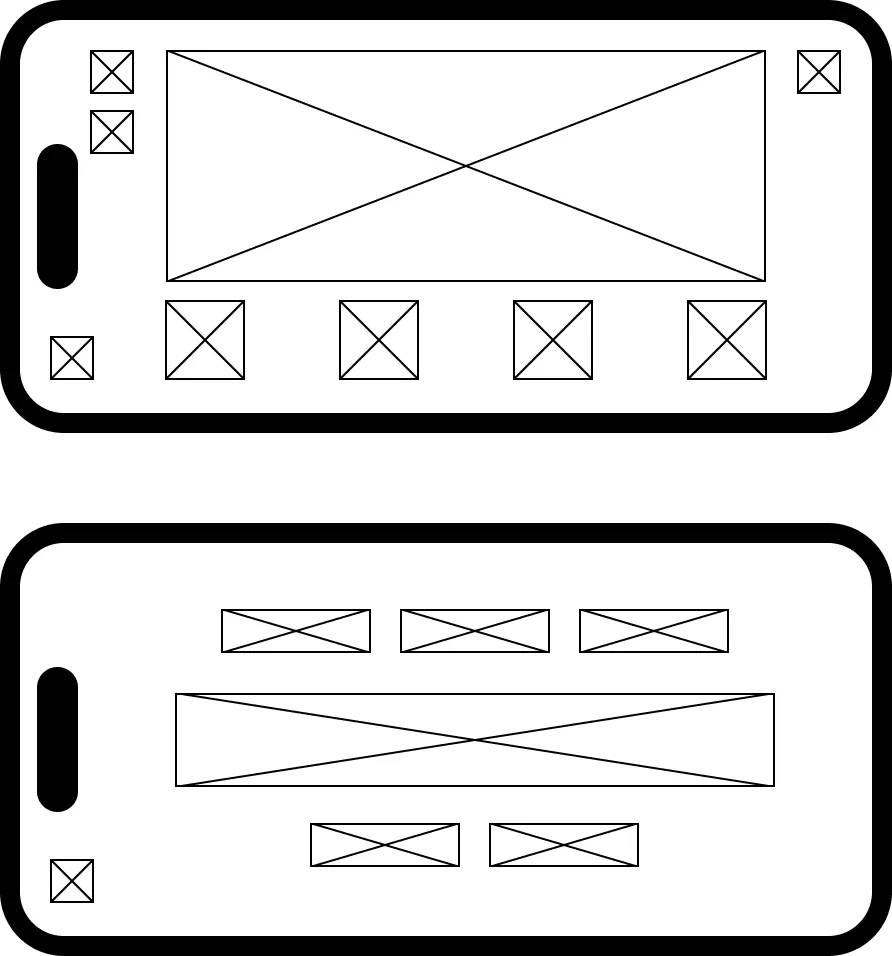
Settings pop-up
Once the map was set, the open question was where secondary controls should go. Putting every option on the main canvas felt crowded, so I tried grouping metronome, drone, notation, and octave behind a gear icon in a pop-up. The center of the screen stayed about the staff and the Again through Easy buttons, with metro and drone still quick to reach on the side. That kept the first layout honest, but it introduced a new problem for the next step.
Hi-fi: one screen, icon controls
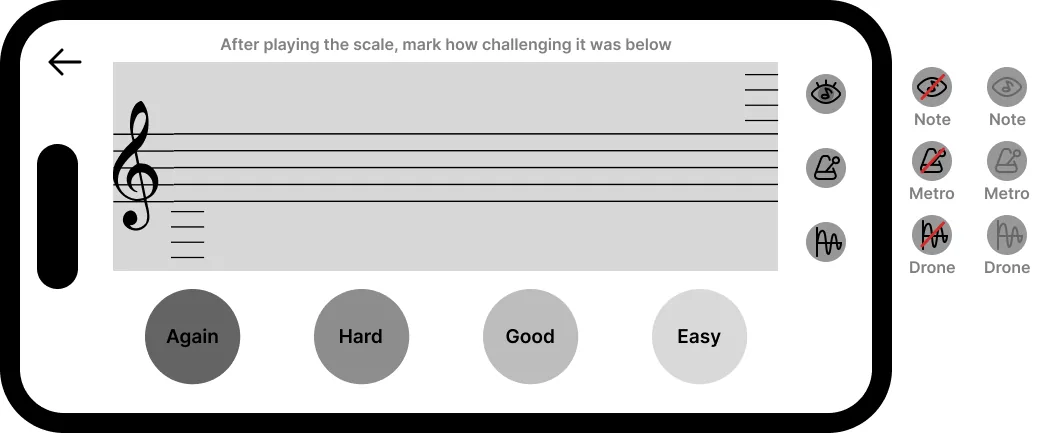
The pop-up reduced clutter, but it added friction. Students had to leave the practice surface to change tools, which did not feel right while they were playing. I removed the modal and placed notation, metronome, and drone on the same screen as round icon buttons so everything stays one tap away. Custom icons replaced long labels so the view stayed quiet. Beside the phone I tested two inactive styles: a red strike-through versus a softer grayed-out state.
Legibility: longest scale & notation off
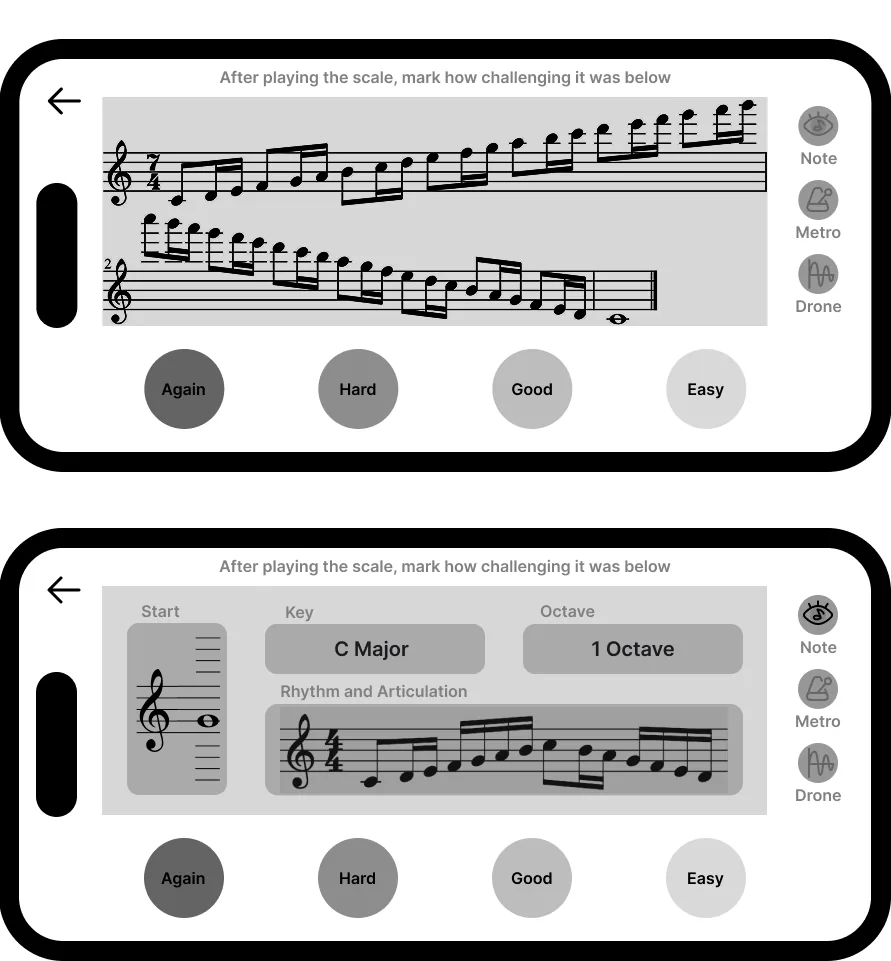
The one-screen hi-fi layout looked balanced for a typical example, but I still had to stress-test real music. I drew the longest scale we would reasonably show to confirm the notation stays readable in landscape with the new icons and buttons. Then I designed notation off: a lighter panel with start note, key, octave, and a short rhythm strip. That way students who hide the full score still know what they are practicing.
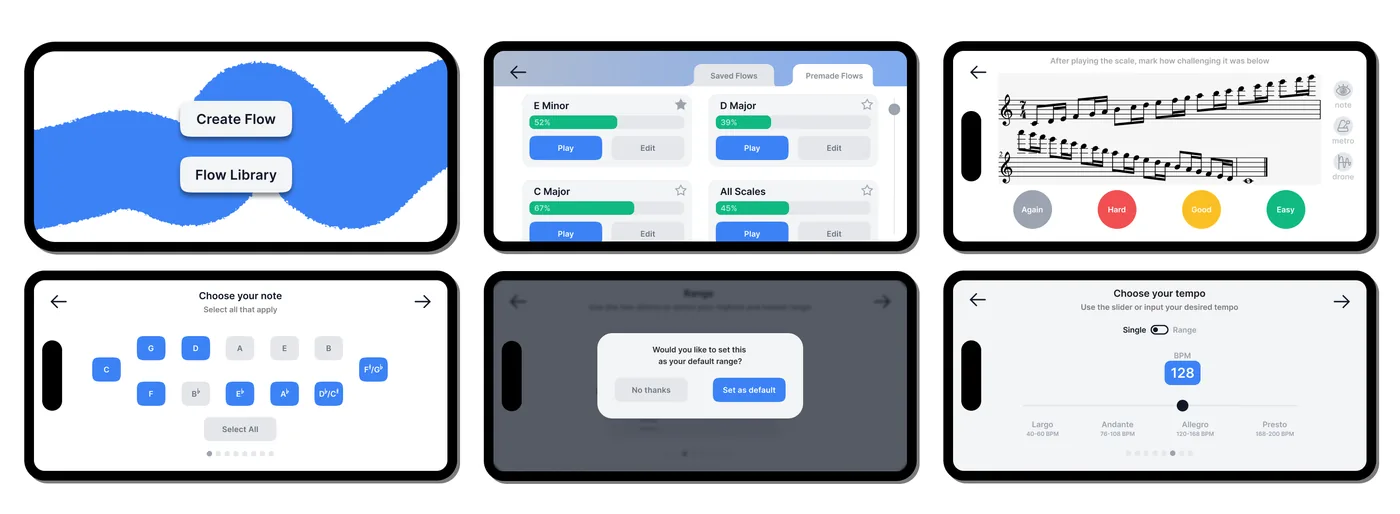
Final screens in color
This is not every screen in the app. It is a curated set of high-fidelity, full-color frames so you can see how the UI looks once illustration, palette, and components come together on a few key flows.